Accessing and Operating Microarrayer via Network
Connect Microarrayer to WiFi
This operation must be performed on the microarrayer computer. Click on the WiFi icon select your WiFi network and enter WiFi password.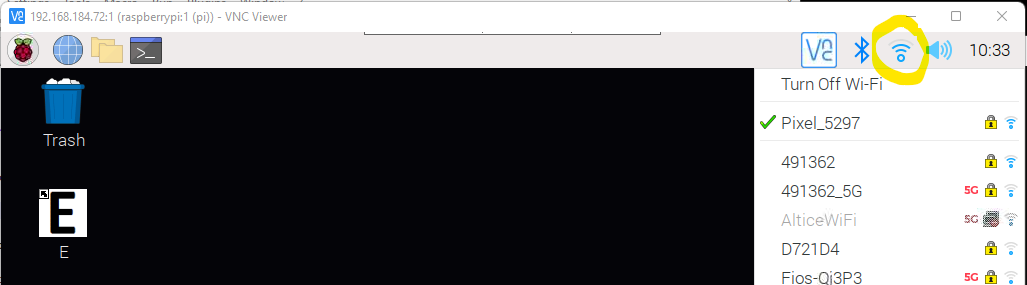
Find out Arrayer IP Address
Open terminal on the arrayer computer and type "ifconfig"Look at the "wlan0" section of the message. It contains the IP address of the arryers computer. In this case 192.168.184.72
Record this IP address and use it for connecting to the arrayer via VNC or WinSCP.
Check Arrayer Network Interfaces
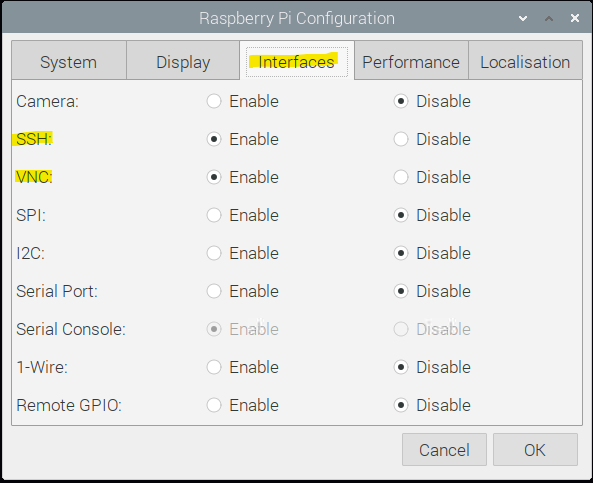
On the arrayer computer: Select Menu > Preferences > Raspberry Pi Configuration > InterfacesCheck if SSH and VNC interfaces are enabled.
Access Arrayer via Terminal and FTP
FTP access to the arrayer is need for transferring files from local PC to the arrayer computer in case the Program Editor is installed on the PC. A program created on a PC can be copied to the arrayer computer and run on the arrayer. For remote access to the arrayer from Windows PC we recommend installing an open source FTP client WinSCP. It combines both Terminal connection and File Browser. - Download WinSCP from: https://winscp.net/eng/download.php Install it on your PC. We recommend choosing "Commander" option during the installation.- Launch WinSCP. - Click New Session tab.
- In the Login dialog enter IP, login and password. Hit [Save] button.
- Save Session with some name ( i.e. B00scara@IPaddress )
- Select the saved session and hit [Login] button.
WinSCP will run a window with two sections. Left section will show local folders of the PC. Right section will show folders of the arrayer computer.
/home/pi/lnt - is the Home folder for the Microarrayer software. /home/pi/lnt/data - folder contains all print programs and other settings.
Accessing Arrayer GUI with VNC Client from External PC
VNC will allow remote access to the microarrayer GUI from the external computer. The arrayer GUI will be visible in the VNC client window. All operations can be performed from the remote PC the same way as they are performed on the arrayer. - Download free VNC viewer from REALVN website: https://www.realvnc.com/en/connect/download/viewer/ Select the one with your operating system. ( for this document we use Windows 11 ). - Install VNC viewer with all default options prompted by the installer. - Run VNC viewer Start > Type "VNC" > Click on VNC icon If VNC prompts to sign-in to a REALVNC account, choose "Run Without Sign-in" option.- Enter the arrayer IP address into the address field of VNC viewer
- When Connecting the first time VNC will show the "Identity Check" dialog.
Click [Continue] button. This dialog will never appear in further connection attempts. - Login into the arrayer VNC server with the same login and password as for local login.
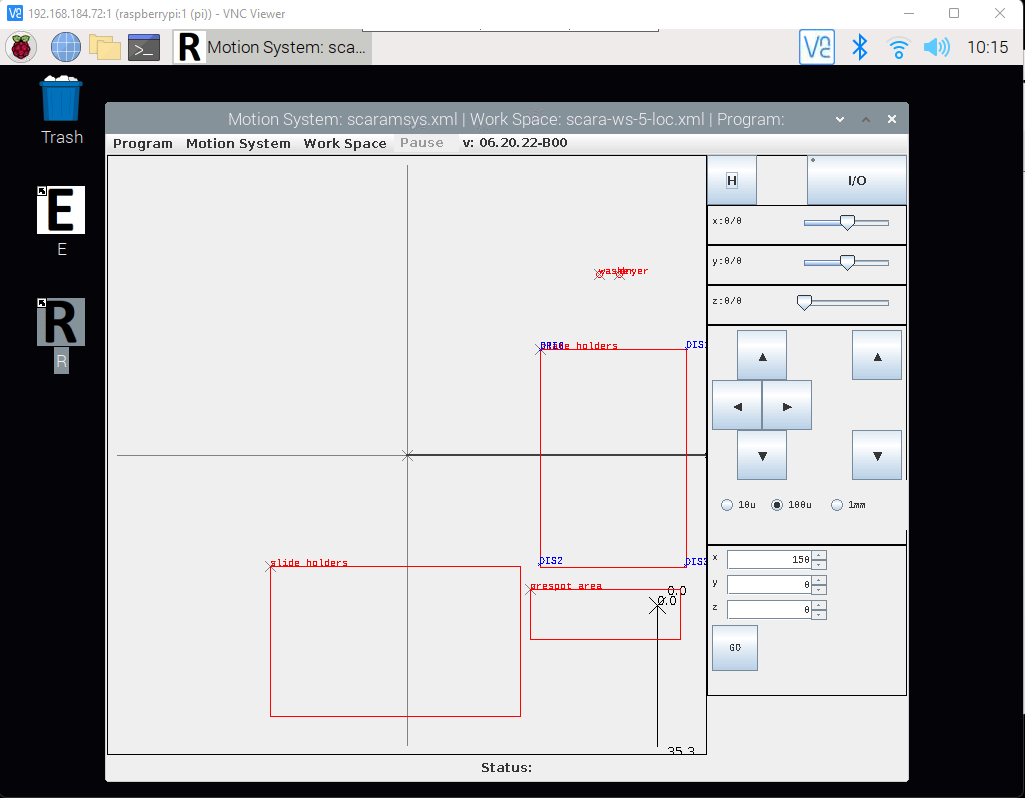
- You will see a window with the arrayer desktop. Run the "R" module and use the arrayer controls the same way they are used locally.
IMPORTANT! Headless Configuration VNC Connection
Headless configuration is when there is NO monitor connected to the arrayer. In this case before making VNC connection to the arrayer you need to create a "Virtual Desktop" on the arrayer internal computer. (Otherwise the VNC window will not accommodate the Arrayer desktop properly ). -Connect to the arrayer via VNC as described above. - Launch terminal and type command > "vncserver" ( hit Enter)The command will end up with a message showing and IP address for virtual desktop. New desktop is raspberrypi:1 (192.168.184.72:1) It is the arrayer IP addres with ":1" addition to it.
- Use this new address to reconnect to VNC server.